


Scratchbuilds - fun with foamboard!
2 posters
Page 1 of 1

Scratchbuilds - fun with foamboard!
![]() by S W Dickson Sun Dec 27, 2009 9:20 am
by S W Dickson Sun Dec 27, 2009 9:20 am
Just thought I'd share a couple of scratchbuilds I've done over time, and the recipes for success. These were mostly done for GW, and as such some of the models are copyright Games Workshop with no challenge intended, and a couple of models used in some of the creations - however, the basis of the creations is pretty simple and re-usable.
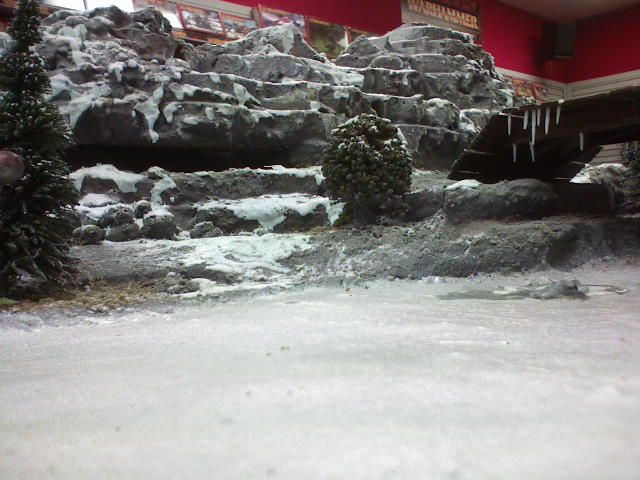
1. An iced over lake and valley - blue tinted polyfilla/spackle smeared over pink foam rock formations for the snow effect, balsa wood for the bridge with xmas decoration icicles, silver foil for ice - with dusting of white spray, varnics, more white spray. "Hard Water" and broken up polystyrene cups for broken ice sections.
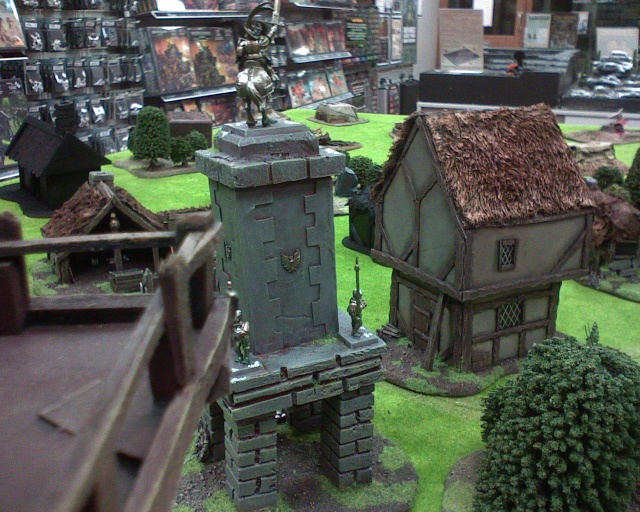
2. A medieval village - lots of half timbered style houses - make foamboard box, with ridged roof; balsa wood for trims, spackle or glued down sandpaper for plaster walls, teddy bear fur glued down and washed with diluted PVA for thatching; pink foam for chimney stacks. Lot's of cool extras help to bring life - leading in windows, timber stacks outside. Ramshackle and rundown - use as few rulers as possible.
A few models glued onto top of Market cross as statues.
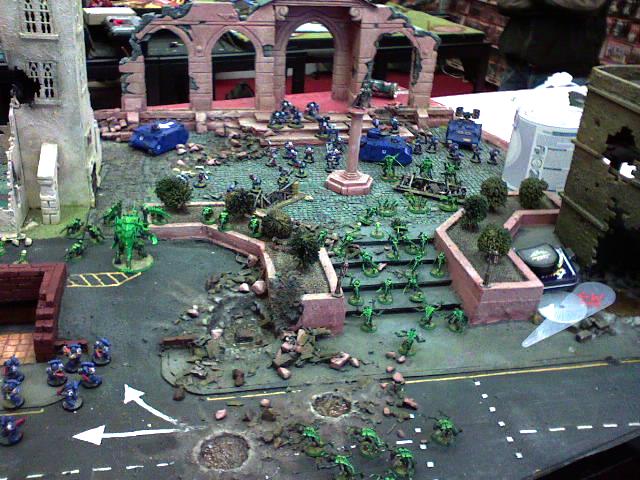
3. Future gothic city - "two tier" - large plaza to fight over tiled with over a three thousand cardboard tiles - big craters help scatter and break up the monotony. Large pink foam arched "temple" - just a sheet of 2" thick foam, with painstaking carving - spackled before spraying to add texture and protection from meltiness. All mounted at 30 degrees from the square, the angle provides more interest and challenge. Big habitats and "church" simply made foamboard with many holes and extras. Road textured with fine sandpaper glued down - brass jewellers rivets add detail to road. Subway entrance leads under board, so rogue dice can be retrieved!
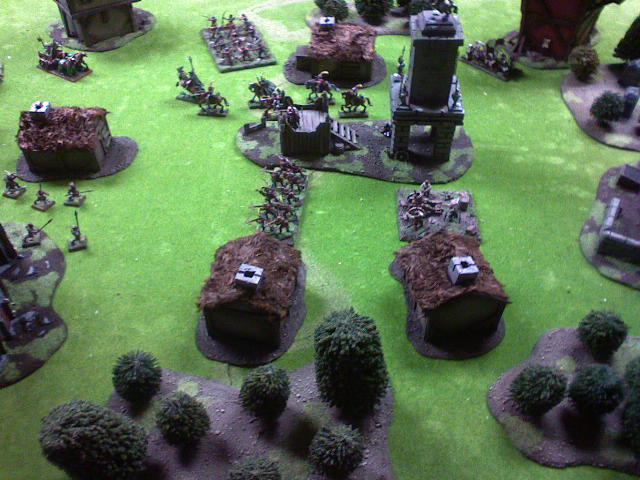
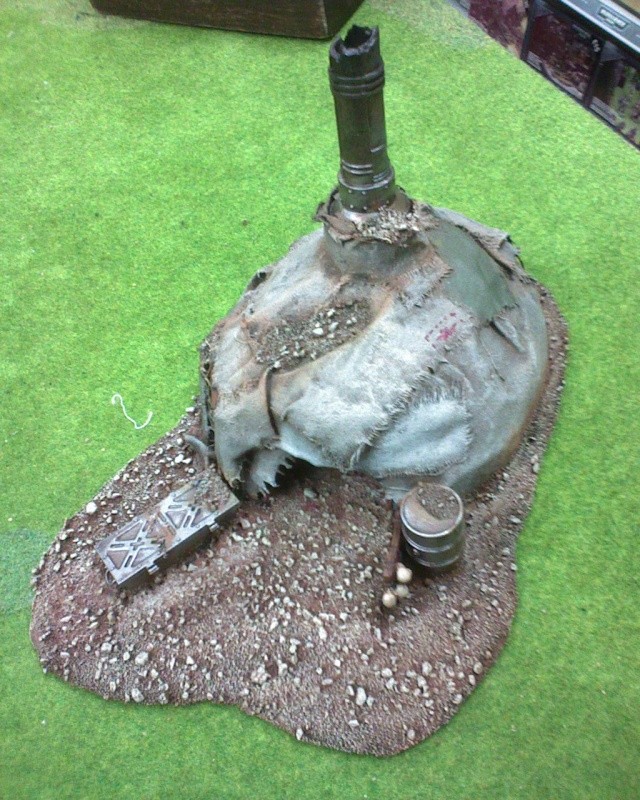
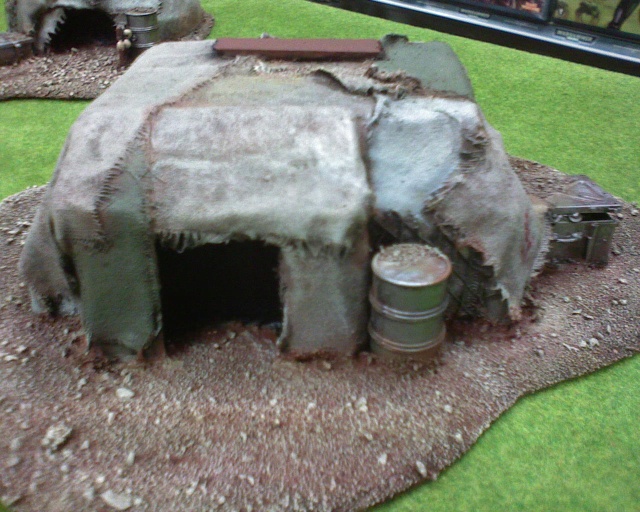
4. Placeable badlands habi-tents. Pink foam roughly cut to shape, then layered with PVA soaked cotton fabric strips and squares - just a thin white fabric - one of the cheapest you can get. Various add-ons and painting techniques bring it all to life.
Placeable "scatter" terrain generally mounted on MDF baords which is then textured appropriately. SOme of the more extravagant stuff is unsuitable to be made like this, and therefore made as a unmovable display.
Number one hint - lots of sharp tools - a blunt stanley blade'll get you nowhere fast. I would also highly recommend the planning of what you want to achieve, just so you know what size/look/feel you are going for. No point building a box then deciding you need a door. I have made a few pieces with just a moments thought, and they don't last long. The climbable tree was quite fun though - poster tube glued to base, snipped at top to taper together, gaffa tape it together, push and glue/tape pencils into tube trunk, tape more pencils and things onto other pencils for complex branches; once finished coat the whole thing in polyfilla/spackle for strength/texture - use painted scouring pads for bushy tree ends that models can stand on - it died quite quickly though, fulfilled its purpose as the big tree they climb in the hobbit.
1. An iced over lake and valley - blue tinted polyfilla/spackle smeared over pink foam rock formations for the snow effect, balsa wood for the bridge with xmas decoration icicles, silver foil for ice - with dusting of white spray, varnics, more white spray. "Hard Water" and broken up polystyrene cups for broken ice sections.
2. A medieval village - lots of half timbered style houses - make foamboard box, with ridged roof; balsa wood for trims, spackle or glued down sandpaper for plaster walls, teddy bear fur glued down and washed with diluted PVA for thatching; pink foam for chimney stacks. Lot's of cool extras help to bring life - leading in windows, timber stacks outside. Ramshackle and rundown - use as few rulers as possible.
A few models glued onto top of Market cross as statues.
3. Future gothic city - "two tier" - large plaza to fight over tiled with over a three thousand cardboard tiles - big craters help scatter and break up the monotony. Large pink foam arched "temple" - just a sheet of 2" thick foam, with painstaking carving - spackled before spraying to add texture and protection from meltiness. All mounted at 30 degrees from the square, the angle provides more interest and challenge. Big habitats and "church" simply made foamboard with many holes and extras. Road textured with fine sandpaper glued down - brass jewellers rivets add detail to road. Subway entrance leads under board, so rogue dice can be retrieved!
4. Placeable badlands habi-tents. Pink foam roughly cut to shape, then layered with PVA soaked cotton fabric strips and squares - just a thin white fabric - one of the cheapest you can get. Various add-ons and painting techniques bring it all to life.
Placeable "scatter" terrain generally mounted on MDF baords which is then textured appropriately. SOme of the more extravagant stuff is unsuitable to be made like this, and therefore made as a unmovable display.
Number one hint - lots of sharp tools - a blunt stanley blade'll get you nowhere fast. I would also highly recommend the planning of what you want to achieve, just so you know what size/look/feel you are going for. No point building a box then deciding you need a door. I have made a few pieces with just a moments thought, and they don't last long. The climbable tree was quite fun though - poster tube glued to base, snipped at top to taper together, gaffa tape it together, push and glue/tape pencils into tube trunk, tape more pencils and things onto other pencils for complex branches; once finished coat the whole thing in polyfilla/spackle for strength/texture - use painted scouring pads for bushy tree ends that models can stand on - it died quite quickly though, fulfilled its purpose as the big tree they climb in the hobbit.

S W Dickson- Admin
- Posts : 228
Join date : 2009-12-06
Age : 46
Location : Terra Incognita -

Re: Scratchbuilds - fun with foamboard!
![]() by S W Dickson Sun Dec 27, 2009 9:45 am
by S W Dickson Sun Dec 27, 2009 9:45 am
Another tip for great big buildings - make a wash, something you can pour on! It's like "dipping" a model, but much messier. I used to call it tobacconising - giving it an age staining.
Paint you model as close to the colours that you want - let dry. It will probably be quite cartooney, no matter how good you are - it's hard to emulate the chaos of nature.
Mix up some Brown, Yellow and Green paints to a suitably horrid mucky colour with water - to about the translucency of milk. Put mix into plant mister. Spray away until model is soaking. Leave until it begins to dry slightly, then hit it with a mist of clean water. Then wait for it to dry. Then hit it again with your muck, possibly with a colour variance. then again a light clean misting - make that wash run everywhere!
After allowing it to dry, your building or whatever looks more like it's been outside for a good few years rather than just freshly painted. Adds that seasoned effect. You could always leave it outside for a good few years, but this is a quicker solution.
Obviously, this is a totally random and un-scientific approach, and as such, it should be tested and adapted to your own tastes. I found it quite handy though when making a couple of dozen small buildings and pieces of terrain at a time, and rather than add all the detail by hand, sticking them outside and properly dousing them works just as well. Particularly good for massive boards - such as fortresses - rather than mixing a stone colour, use a standard grey (eugh) and give it plenty of greens, browns, reds in varying degrees and locations. Really adds to the realism.
S W Dickson- Admin
- Posts : 228
Join date : 2009-12-06
Age : 46
Location : Terra Incognita -
Re: Scratchbuilds - fun with foamboard!
![]() by sucramreverse Mon Dec 28, 2009 8:24 pm
by sucramreverse Mon Dec 28, 2009 8:24 pm
that ice board looks amazing, as do all of them, but is there any other shots of that one?

sucramreverse- Active Member

- Posts : 129
Join date : 2009-12-08
Age : 35
Location : Your Imagination.
Re: Scratchbuilds - fun with foamboard!
![]() by S W Dickson Mon Dec 28, 2009 8:31 pm
by S W Dickson Mon Dec 28, 2009 8:31 pm
I'm afraid not matey. Dunno where it reside now either - probably Carlisle or Glasgow GW. The "Sci-Fi" city was at Glasgow last time I checked - they covered that one in snow - the heathens!
I did find a shot of my Zombie Apocalypse board though - tonnes of in progress shots as well. I'd just got a new camera phone when I was making it! Anyway, it's a bunker complex sunk into the board with removable doors and stuff. Lots of Foamboard - Lots.

I did find a shot of my Zombie Apocalypse board though - tonnes of in progress shots as well. I'd just got a new camera phone when I was making it! Anyway, it's a bunker complex sunk into the board with removable doors and stuff. Lots of Foamboard - Lots.
S W Dickson- Admin
- Posts : 228
Join date : 2009-12-06
Age : 46
Location : Terra Incognita -
Re: Scratchbuilds - fun with foamboard!
![]() by sucramreverse Mon Dec 28, 2009 8:36 pm
by sucramreverse Mon Dec 28, 2009 8:36 pm
that's a great idea sinking it in like that, makes it a lot more interesting.
sucramreverse- Active Member
- Posts : 129
Join date : 2009-12-08
Age : 35
Location : Your Imagination.
Re: Scratchbuilds - fun with foamboard!
![]() by S W Dickson Mon Dec 28, 2009 9:00 pm
by S W Dickson Mon Dec 28, 2009 9:00 pm
It was gonna have a roof - removable by corridor/room - the zombies were set up beforehand and you couldn't tell what was inside, but you knew they were there.
It evolved into a random roll of zombies as you entered - mainly due to the fact I couldn't be bothered spending two weeks getting a roof to fit. (I let a colleague cut some of the foam, and it wasn't, well, as squared as it ought to have been...)
It evolved into a random roll of zombies as you entered - mainly due to the fact I couldn't be bothered spending two weeks getting a roof to fit. (I let a colleague cut some of the foam, and it wasn't, well, as squared as it ought to have been...)
S W Dickson- Admin
- Posts : 228
Join date : 2009-12-06
Age : 46
Location : Terra Incognita -
Page 1 of 1
Permissions in this forum:
You cannot reply to topics in this forum|
|
|